Exploitation Manual#
User roles and capabilities#
The AIOPEN Exploitation Services allow searching, discovering, and using the resources published in the platform.
The entry point to the AIOPEN Exploitation Service is the Marketplace which is accessible at https://aiopen.spaceapplications.com .
The capabilities depend on the user role:
Anonymous users may access the Marketplace and discover the published resources (trained models and training datasets). The resources description may omit technical details that are restricted to authenticated users.
Authenticated users may discover the published resources, and execute trained models to obtain predictions. Trained models may also be started as services and invoked using an OGC API Processes compatible interface.
Authenticated developers, may discover the published resources. In addition to the execution of trained models (and running them as services), developers may also order training datasets. Ordered datasets become available in the developers’ Private IDE environment and may be used to train new models.
The Home Page provides information about the Service, including contact information. At the top, a navigation bar gives access to the different features of the application. Different entries are displayed to anonymous users, authenticated users, and developers.
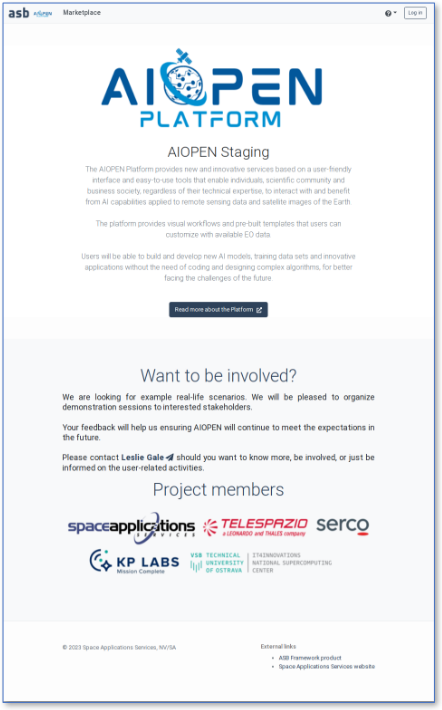
AIOPEN Exploitation Services Home Page#
The AIOPEN Marketplace#
Any visitor may access the Marketplace, search for published resources (including trained models and training datasets), and visualise their properties.
Anonymous visitors may not create, edit, delete or execute anything in the Service.
More specifically, anonymous users may only access the following resources:
The Service portal home page;
The Marketplace, including details of the published models and datasets;
The online Service user manual (this document);
The Login form.
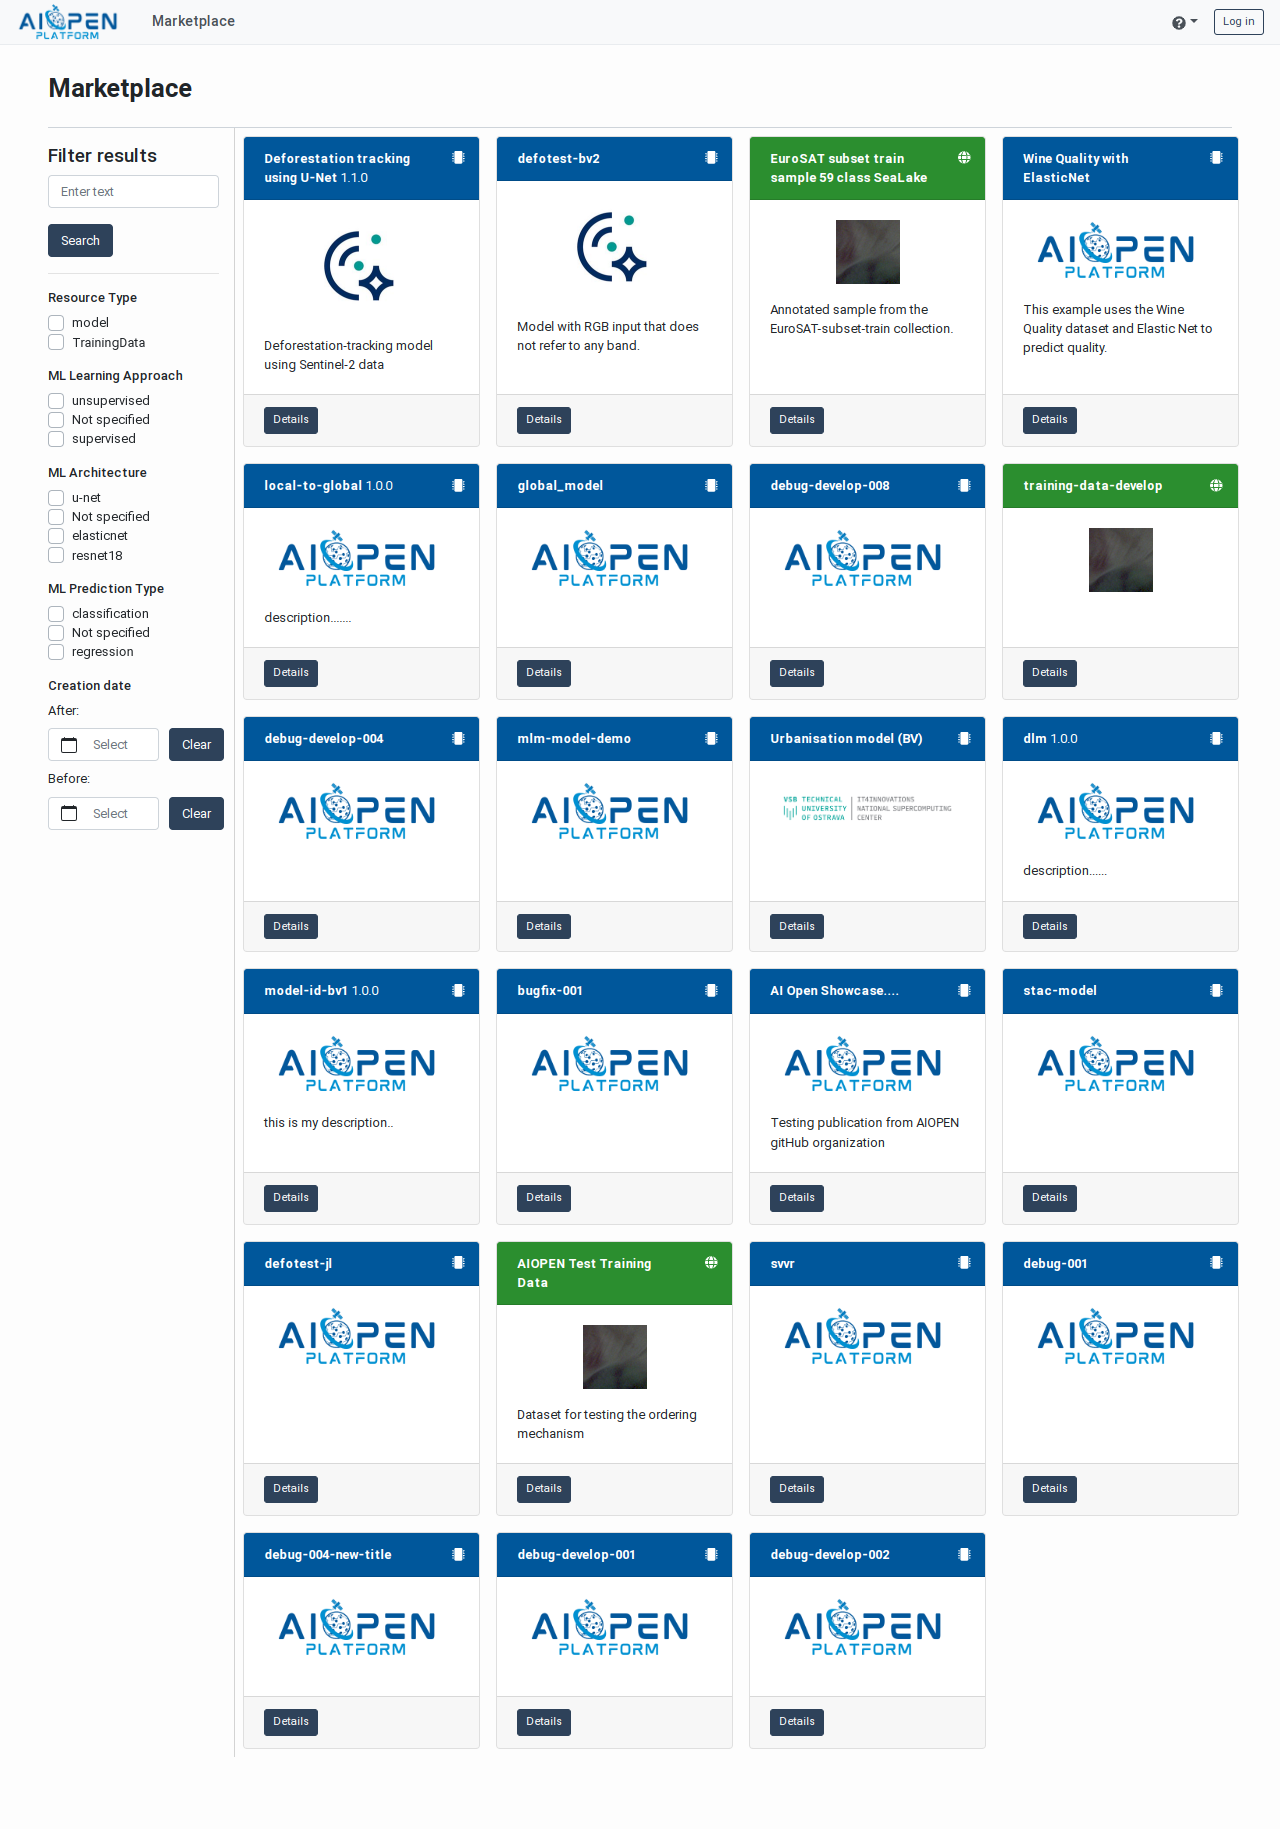
Marketplace accessed by an anonymous visitor#
The Marketplace displays the following elements:
In the left margin, organised vertically:
A text search field and a “Search” button.
Filters for various facets (note: their visibility depends on the resources matching the searched text).
In the main panel, cards representing the resources matching the filter criteria.
By default, all the published resources are displayed.
Note: Click on the “Search” button to refresh the resource cards, if necessary, instead of refreshing the whole page with the browser.
Each resource card displays, if available:
The resource name and a short description
A logo
A button for accessing the resource details page
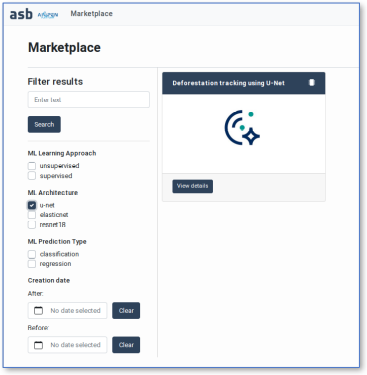
Marketplace with selected facets (cropped)#
User Authentication#
Use the Login button in the navigation bar to access the login form.
Note
The Service allows authenticating using a local account or an OIDC-compatible Identity Provider. Always use OIDC to authenticate. This also permits to authenticate using a GitHub account.
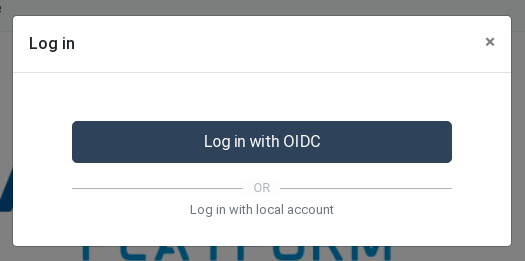
Use OIDC to authenticate in the Service#
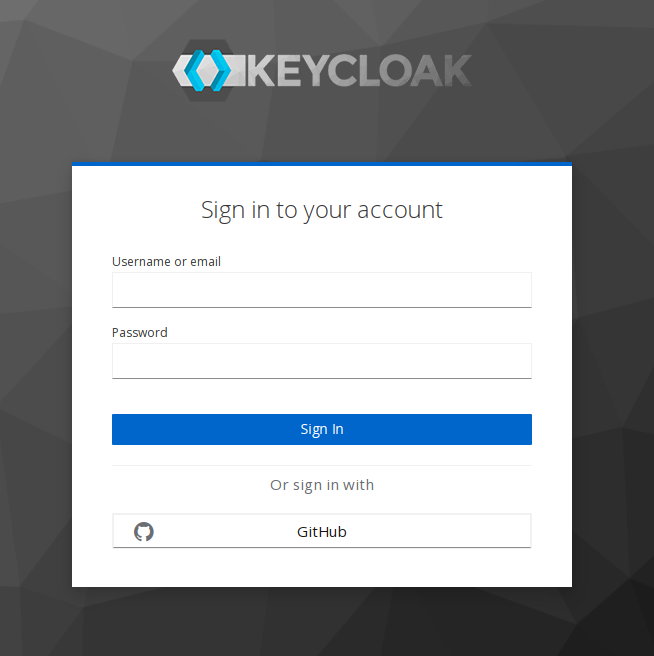
AIOPEN login form which also allows to sign-in via GitHub#
The navigation bar of regular users include an Executions tab for accessing the models executions monitoring and reports, as well as a menu for accessing personal information such as the user profile, the accepted Terms and Conditions and an history of the resources usage.
In addition, user having a developer profile also see get a Development menu in the navigation bar that gives access to the development tools described in the Developer Manual. Selecting any of these entries opens the target tool in a new page.
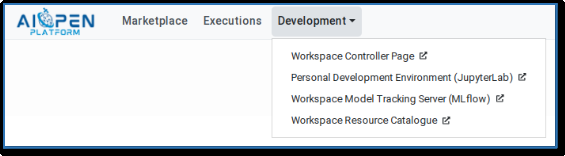
The navigation bar of a Developer user#
Discovering trained models#
Trained models are displayed in the Marketplace with a dark blue title bar. Click on the “Details” button on a trained model card to access the model Details page. This shows the model name and description as well as various information organised in tabbed panels:
Properties – The resource core properties, including the terms and conditions for using it
Signature – The description of the model input and output parameters
Themes – The related themes as specified by the model developers
Contacts – Information about the model developers and/or the model providers
Authenticated users also have access to the following elements:
Training Details – The parameters and the metrics collected during the training, if available in the model metadata.
Model-as-a-Service – Allows starting and stopping the model as a service (MaaS). The MaaS exposes an OGC API Processes interface. See Running a model as an OGC processing service for details.
Raw JSON – Displays the model properties in raw format (STAC Item).
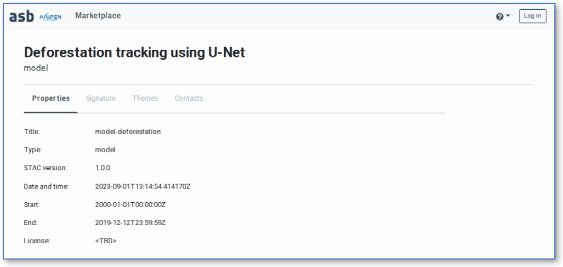
Details page of the “Deforestation” model (anonymous user)#
Executing a model to obtain predictions#
Authenticated users may use the Marketplace to execute trained models and obtain predictions. Executed models are deployed on‑the‑fly, executed, and undeployed automatically. A model consumes cloud resources from the time it is deployed until it is undeployed.
The web‑based parameterisation forms are generated dynamically using the model signature.
The past and current model executions may be monitored in the Executions page, which also gives access to the individual execution reports.
Selection and parameterisation#
Authenticate in the AIOPEN Service, search for the appropriate model and access its Details page. This includes an Execute → button in its upper-right corner.
If special conditions of use have been specified by the model developer (or provider), this is mentioned as License in the Properties tab.
Click the Execute → button in the page header.
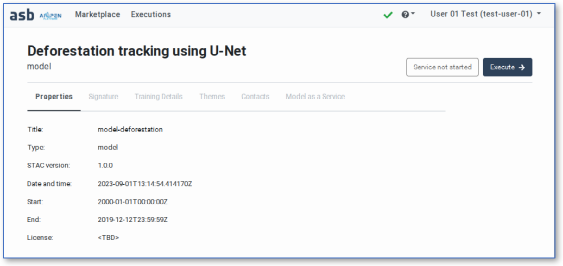
Trained model seen by authenticated user#
The model execution form is displayed. The input fields in this form are automatically generated using the model signature and properties.
If the model requires an image as input, a Browse button allows selecting a file on the local system. The image content must match the datatype and shape expected by the model (e.g. float32 and [ -1, 6, 1024, 1024 ] for a 6 bands, 1024x1024 image with float32 pixel values). The image is uploaded, stored in AIOPEN, and converted into a tensor automatically.
Note
Multi-dimensional input data such as images may need to be transformed to ensure their properties (size, datatype, value range) match the expectation of the model. Techniques for preparing the input data are provided in the section Inference Pipeline: Providing valid input data, below.
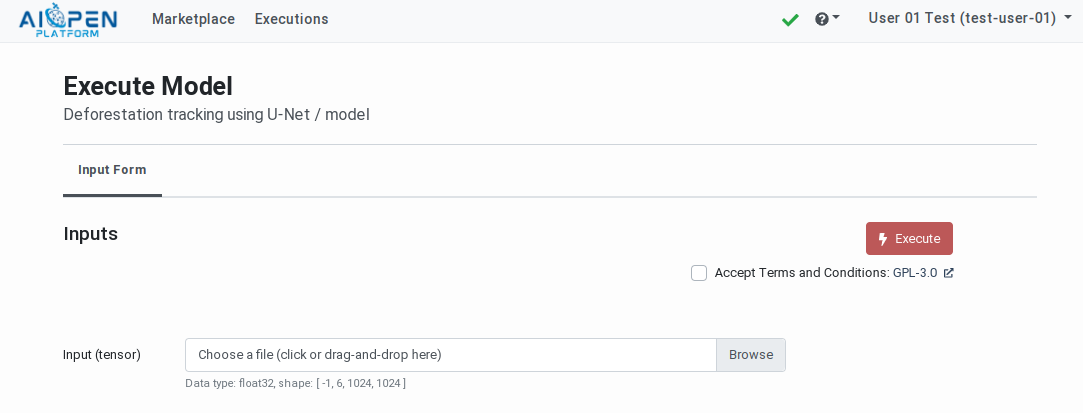
Model execution form#
Acceptance of the Terms and Conditions
If the model has associated terms and conditions (T&C), a check box and a link to the conditions text are displayed below the Execute button. The link allows opening the text in a new page and the check box allows expressing the user consent. The consent is recorded and re‑applied in future executions of any model referring to the same T&C.
The Execute button becomes active when all the inputs are filled-in and the consent to the T&C given.
Click on the Execute button to submit the execution request to AIOPEN.
The Executions page is automatically displayed and the newly requested execution displayed at the top.
The accepted T&Cs may be inspected and revoked individually in the User Profiles page. See: Terms and Conditions Management.
Inference Pipeline: Providing valid input data#
The AIOPEN platform does not support importing or applying pre-built inference pipelines on input values. The Marketplace and the MaaS interfaces require the input data to be already pre-processed and ready to be provided to the models for obtaining predictions.
When the operations required to transform the input values are specified in the model properties these can be inspected in the model details pages and in particular in the “Raw JSON” panel.
Note: The “Raw JSON” panel displays the JSON-encoded STAC descriptor in which the model properties are encoded. A more user friendly display will be added in the future.
In the STAC descriptor of trained models one can find for example information on how the input data must be resized (to fit in the expected shape) and how the input data values must be scaled (to fit in the value ranges). See Recommended Information for details.
The operations have a type and parameters which may be translated into processing scripts.
The following example script uses numpy to apply different operations on image channels (loaded using PIL or rasterio):
from PIL import Image
import numpy as np

file_path = "<path_to_image_file>"

try:
  image = Image.open(file_path)
  array = np.array(image)
except:
  # If loading your image using the "PIL" library fails (this may be the case with
  # multi-channel 32-bit TIFF images, for example), use the "rasterio" library instead.
  import rasterio as rio
  with rio.open(file_path) as dataset:
    array = dataset.read()

# Apply an offset on a channel
array[0] = array[0] + 5

# Clip the values in a channel (min: 5, max: 10)
array[1] = np.clip(array[1], 5, 10)

# Scale the third channel: divide all values by 255
array[2] = array[2] / 255.0

# Min-Max Scaling (normalize to range [0, 1])
array[3] = (array[3] - array[3].min()) / (array[3].max() - array[3].min())

# Standardization (z-score normalization)
array[4] = (array[4] - array[4].mean()) / array[4].std()

# Scale by maximum value (range [-1, 1])
array[5] = array[5] / np.abs(array[5]).max()
Other frameworks such as PyTorch/Torchvision and Scikit-learn may be used to achieve the same results. These frameworks also implement operations not supported by numpy. An example is the ability to resize input images using various strategies.
Model properties may indicate that an input must be resized using crop, or pad, or different techniques of interpolation (nearest, linear, cubic, etc.) Each of these may be implemented using PyTorch transformations.
For example:
import torchvision.transforms as T
from PIL import Image
import numpy as np

file_path = "<path_to_image_file>"

size = (256, 256)

transform = T.Resize(
  size,
  interpolation=T.InterpolationMode.BILINEAR,  # or NEAREST, BICUBIC
  antialias=True
)

try:
  image = Image.open(file_path)
except:
  # Again, if loading the image using PIL fails ...
  import rasterio as rio
  from torchvision.transforms import ToTensor
  with rio.open(file_path) as dataset:
      array = dataset.read()
  image = ToTensor()(array)

resized = transform(image)
array = np.array(resized)
Because the model execution API complies with the REST principles, the input data must be encoded as a JSON structure before being transmitted as a request payload.
To convert a numpy array into a list, the tolist() function may be used:
payload = {
  "inputs": [{
      "name": "input-0",
      "shape": shape,  # The shape of the input must match the signature of the model
      "datatype": dtype,  # The data type of the input values must match the signature of the model
      "data": array.tolist()
  }]
}
Execution monitoring and reports#
The Executions page is displayed when a model is executed but is also accessible at any time via the navigation bar.
This page lists the model executions in a paginated table, sorted in reverse chronological order. The on‑going and most recent executions are thus listed first. Each table row may be expanded to inspect the execution parameters. A status box indicates if the execution has started, is on‑going or whether it completed successfully or not. Next to the status box, an Execution Report button allows opening individual model execution reports.
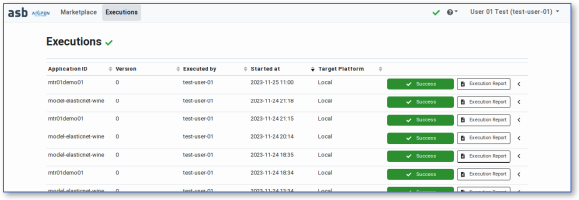
Models executions monitoring page#
Execution reports provide information about the model execution, including the start and end time, the input parameters and the outputs. Certain types of outputs are displayed in the page (e.g. png files). Links to the output files are also provided.
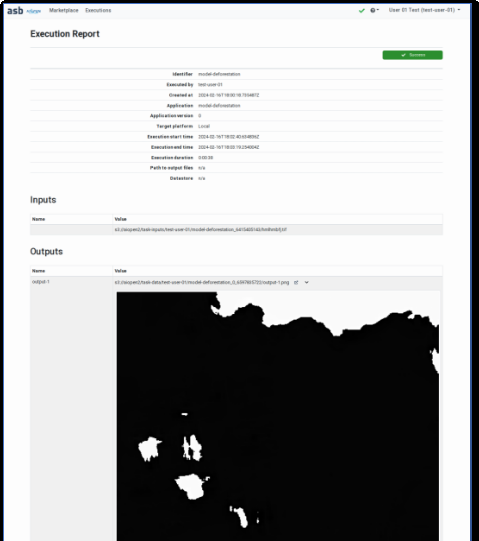
Model execution report (cropped)#
Running a model as an OGC processing service#
Starting a Model as a Service (MaaS) has the advantage to allow making many predictions without the overhead brought by the deployment and undeployment operations.
Models with many dependencies (e.g. Python library for running on a GPU) may take several minutes to be deployed. When executed on‑demand (see Executing a model to obtain predictions), these operations are required for each execution.
When a Model is deployed as a Service, it is deployed once and may be invoked many times until it is explicitly undeployed. The MaaS exposes an OGC API – Processes compatible interface. End‑points allow applications to make predictions remotely.
A Model running as a Service consumes cloud resources from the time it is deployed until it is explicitly undeployed by its “owner” (the user who started it).
Starting the Model as a Service#
In order to start a Model as a Service, search for this model in the Marketplace and open its details page. A button in the title bar indicates whether the model is already running as a service or not. Click on the button, or on the Model as a Service tab to access the dedicated panel.
When the model is not yet deployed, the Model as a Service panel provides instructions and a button allowing to deploy the model.
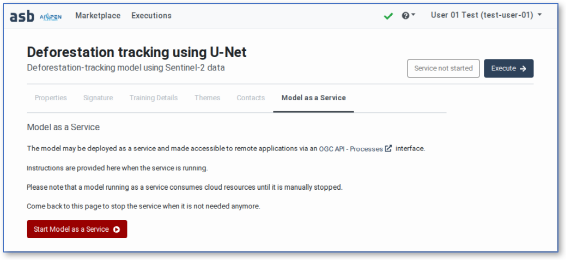
Model not running as a service#
When the Start button is clicked, the model is deployed (but not executed) in the AIOPEN cluster. During the deployment operation, which may take up to a few minutes depending on the model dependencies, the MaaS panel indicates that the model is being deployed.
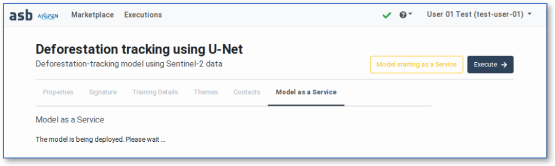
Model being deployed#
When the model is deployed as a service and ready, the MaaS panel displays instructions for making predictions. The panel provides the end‑points: an internal end‑point may be used from within the AIOPEN cluster (e.g. from a Jupyter notebook in a developer IDE), and an external end‑point accessible from outside the cluster.
Communication with the internal end‑point must use the Seldon API V2 protocol .
Communication with the external end‑point must use the OGC API – Processes specification.
A button allows stopping the model running as a service.
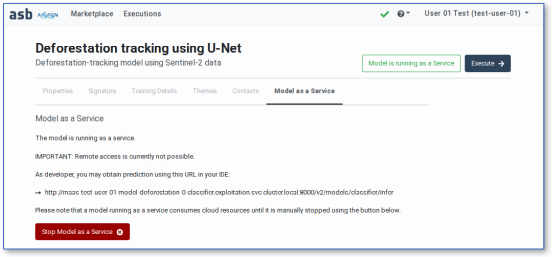
Model running as a service#
Authenticating and Accessing the Model Service#
Note
Authenticating in the web-based AIOPEN Services such as the Marketplace and the Workspace Controller page may be done using GitHub accounts accessed via the integrated identity provider (Keycloak). Doing the same with an automated script is however not possible. This is due to the authentication flow taking place when the identity provider is used as an identity broker. The redirections to and from GitHub for performing the actual authentication cannot be automated in a script.
As an alternative it is possible to use the user account created automatically in Keycloak the first time a user authenticates via GitHub. By default this Keycloak account has no password. The user may ask the platform operator to configure a temporary password that must be changed next time they connect.
This user account in Keycloak may then be used as explained below.
The Model running as a service is exposed using an EOEPCA ADES (powered by ZOO-Project ) and its OGC API - Processes compliant interface.
The service whose base address is https://aiopen.spaceapplications.com/ades/ is protected and will not give access to anonymous or unauthorised users. Authentication and authorisation require an access token to be included in each request.
Currently, accessing the OGC processing service relies on direct access grants, using user name and password. The following information is thus necessary to obtain the access token:
The AIOPEN ADES Client ID:
aiopen-ades-clientThe User name
The User password
The following Python script may be used to obtain the access token for the integrated Identity Provider using the Python-Keycloak Python library . The requests library is then used to communicate with the OGC processing service. The <username> and <password> values must be substituted with the user credentials.
import json
import requests

from keycloak import KeycloakOpenID

BASE_URL = "https://aiopen.spaceapplications.com"

# Replace the User ID and password below
# --------------------------------------
USER_NAME = "<username>"
USER_PASS = "<password>"
CLIENT_ID = "aiopen-ades-client"
REALM = "master"

# Obtain a user access token
# --------------------------
auth_url = BASE_URL.replace("https://aiopen.", "https://auth.aiopen.")
keycloak_openid = KeycloakOpenID(server_url=auth_url,
                                 realm_name=REALM,
                                 client_id=CLIENT_ID)
token_info = keycloak_openid.token(USER_NAME, USER_PASS)
access_token = token_info["access_token"]

# Initialise ADES requests, providing the access token in a cookie
# ----------------------------------------------------------------
ades_url = f"{BASE_URL}/ades/{USER_NAME}/ogc-api"
headers = {
    "Host": "aiopen.spaceapplications.com",
    "Accept": "application/json",
    "cookie": f"asbglobaltoken={access_token}",
}

# List processes (model service) available in the ADES
# ----------------------------------------------------
response = requests.get(ades_url + "/processes", headers=headers)
response.raise_for_status()
print("Processes:")
processes = response.json()["processes"]
for process in processes:
     print(f"  - {process['id']}")

# Describe a process (model service)
# ----------------------------------
PROC_ID = processes[-1]["id"]
response = requests.get(f"{ades_url}/processes/{PROC_ID}", headers=headers)
response.raise_for_status()
print("Process description:\n" + json.dumps(response.json(), indent=2))
Example output (truncated):
Processes:
  - echo
  - display
  - model-elasticnet-wine
  - maas-admin-model-deforestation-1.1.0-classifier
  - maas-admin-urbanisation-bv-0-classifier
  - maas-admin-model-elasticnet-wine-0-classifier

Process description:
{
  "id": "maas-admin-model-elasticnet-wine-0-classifier",
  "title": "model-elasticnet-wine",
  "description": "model-elasticnet-wine",
  "mutable": true,
  "version": "0.0.14",
  "outputTransmission": [
    "value",
    "reference"
  ],
  "jobControlOptions": [
    "async-execute",
    "dismiss"
  ],
[...]
Note
The lifespan of the access tokens generated for accessing the OGC processing service is 30 minutes. As a consequence, before re-using an access token, or in case of long lasting executions, care must be taken of the token expiration time and a new access token must be obtained if necessary (e.g. using user credentials as above or using the refresh token included in the keycloak_openid.token(...) response).
Calling the Model Service Remotely#
Models exposed as OGC processes take a single input value named model_inputs, formatted as a JSON document. The inference request containing the model inputs (also formatted in JSON) must be serialized as a string and submitted as process input.
Here is a code fragment for preparing the execution of the example “Wine quality” model:
inference_request = {
    "parameters": {
        "content_type": "pd"
    },
    "inputs": [
        {
          "name": "fixed acidity",
          "shape": [1],
          "datatype": "FP32",
          "data": [7.4],
          "parameters": {
              "content_type": "np"
          }
        },
        {
          "name": "volatile acidity",
          "shape": [1],
          "datatype": "FP32",
          "data": [0.7000],
          "parameters": {
              "content_type": "np"
          }
        },
        {
          "name": "citric acid",
          "shape": [1],
          "datatype": "FP32",
          "data": [0],
          "parameters": {
              "content_type": "np"
          }
        },
        {
          "name": "residual sugar",
          "shape": [1],
          "datatype": "FP32",
          "data": [1.9],
          "parameters": {
              "content_type": "np"
          }
        },
        {
          "name": "chlorides",
          "shape": [1],
          "datatype": "FP32",
          "data": [0.076],
          "parameters": {
              "content_type": "np"
          }
        },
        {
          "name": "free sulfur dioxide",
          "shape": [1],
          "datatype": "FP32",
          "data": [11],
          "parameters": {
              "content_type": "np"
          }
        },
        {
          "name": "total sulfur dioxide",
          "shape": [1],
          "datatype": "FP32",
          "data": [34],
          "parameters": {
              "content_type": "np"
          }
        },
        {
          "name": "density",
          "shape": [1],
          "datatype": "FP32",
          "data": [0.9978],
          "parameters": {
              "content_type": "np"
          }
        },
        {
          "name": "pH",
          "shape": [1],
          "datatype": "FP32",
          "data": [3.51],
          "parameters": {
              "content_type": "np"
          }
        },
        {
          "name": "sulphates",
          "shape": [1],
          "datatype": "FP32",
          "data": [0.56],
          "parameters": {
              "content_type": "np"
          }
        },
        {
          "name": "alcohol",
          "shape": [1],
          "datatype": "FP32",
          "data": [9.4],
          "parameters": {
              "content_type": "np"
          }
        },
    ]
}


exec_payload = {
  "inputs": {
    "model_inputs": json.dumps(inference_request)
  },
  "response": "raw"
}
The execution payload must then be submitted to the OGC process as follows:
PROC_ID = "maas-admin-model-elasticnet-wine-0-classifier"
exec_url = f"{ades_url}/processes/{PROC_ID}/execution"

headers = {
    "Accept": "/*",
    "Content-Type": "application/json",
    "Prefer": "respond-async;return=representation",
    "cookie": f"asbglobaltoken={ACCESS_TOKEN}",
}

response = requests.post(exec_url, headers=headers, json=exec_payload)
response.raise_for_status()
print(json.dumps(response.json(), indent=2))
The response to the execution request is a JSON document containing information about the job execution. Because the process execution is asynchronous the job status is running at first (as long as the execution is not complete) and the response contains a status link that allows monitoring the progress. When the job execution is complete, the job status turns to successful and the response provides a link to the processing results.
Example job response with status running (thus not containing a link to the execution results):
{
  "jobID": "48b366a0-8b5d-11ef-8d8f-029f0498b221",
  "type": "process",
  "processID": "maas-admin-model-elasticnet-wine-0-classifier",
  "created": "2024-10-16T01:23:44.679Z",
  "started": "2024-10-16T01:23:44.679Z",
  "updated": "2024-10-16T01:23:44.679Z",
  "status": "running",
  "message": "ZOO-Kernel accepted to run your service!",
  "links": [
    {
      "title": "Status location",
      "rel": "status",
      "type": "application/json",
      "href": "https://aiopen.spaceapplications.com/ades/admin/ogc-api/jobs/48b366a0-8b5d-11ef-8d8f-029f0498b221"
    }
  ]
}
Example job response with status successful:
{
  "jobID": "87f39498-823e-11ef-84a6-029f0498b221",
  "type": "process",
  "processID": "maas-admin-model-elasticnet-wine-0-classifier",
  "created": "2024-10-04T10:50:55.833Z",
  "started": "2024-10-04T10:50:55.833Z",
  "finished": "2024-10-04T10:50:56.838Z",
  "updated": "2024-10-04T10:50:55.833Z",
  "status": "successful",
  "message": "ZOO-Kernel successfully run your service!",
  "links": [
    {
      "title": "Status location",
      "rel": "status",
      "type": "application/json",
      "href": "https://aiopen.spaceapplications.com/ades/admin/ogc-api/jobs/87f39498-823e-11ef-84a6-029f0498b221"
    },
    {
      "title": "Result location",
      "rel": "http://www.opengis.net/def/rel/ogc/1.0/results",
      "type": "application/json",
      "href": "https://aiopen.spaceapplications.com/ades/admin/ogc-api/jobs/87f39498-823e-11ef-84a6-029f0498b221/results"
    }
  ]
}
Example job results response:
{
  "model_outputs": [
    5.576883936610762
  ]
}
Stopping the Model Service#
To stop the model running as a service, navigate back to the model details page, reveal the MaaS panel and click on the Stop button.
Stopping a MaaS takes only a few seconds. From that time, it is not available anymore for making predictions.
Inspecting the Models running as Services#
The Resources Usage Tracking page, accessible in the user menu (in the navigation bar), provides the list of models that have been, or are still, running as Services.
The page contains the list of currently running MaaS above the history of past MaaS. Each row contains a button for navigating to the corresponding model details page. The active MaaS may be stopped from this page as well.
Discovering and Ordering Training Data#
Training Data published on the Marketplace may be discovered by any user. Developers have the possibility to order these datasets to train new models.
Discovering Training Data#
Training datasets are displayed in the Marketplace with a green title bar. Click on the Details button on a training dataset card to access the dataset Details page. This shows the core dataset properties, including the name and description, the publishing date and time as well as the terms and conditions, if specified by the dataset provider.
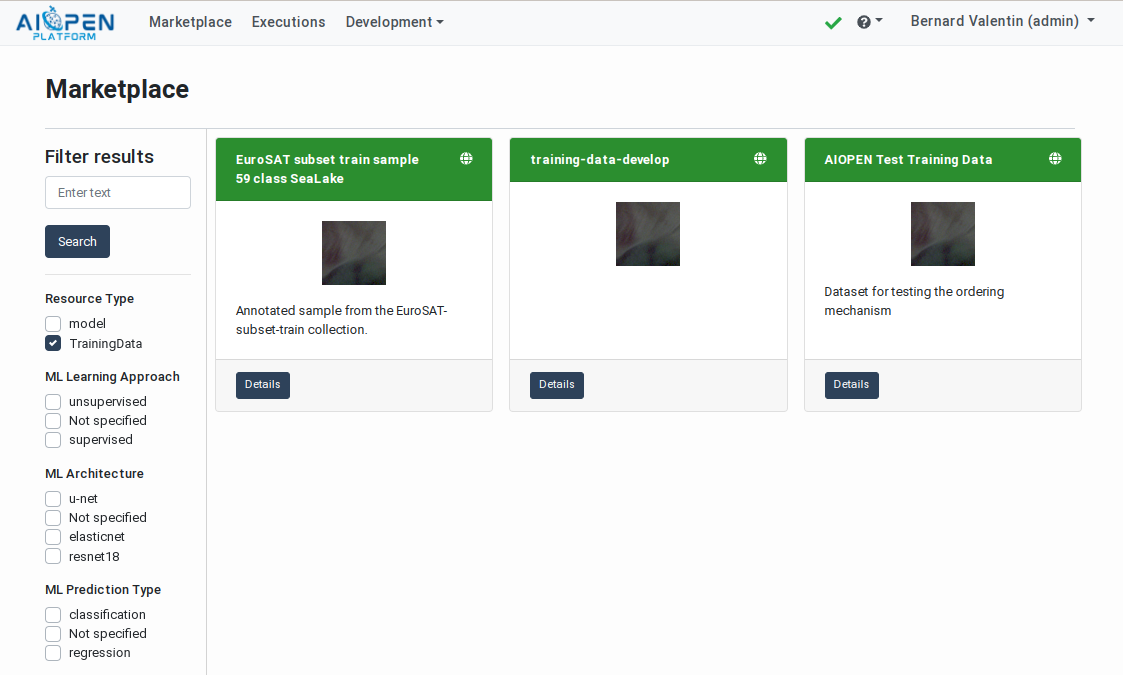
Datasets displayed on the Marketplace#
Authenticated users have access to additional information organised in tabbed panels:
Themes – The related themes as specified by the model developers
Contacts – Information about the model developers and/or the model providers
Raw JSON – Displays the model properties in raw format (STAC Item).
An additional button and panel are displayed to users with a developer profile. These allow ordering the dataset for training new models.
Ordering Training Data#
Published datasets may be used by users having a developer profile to train new models. To do so, access the Dataset Usage panel in the dataset Details page and follow the instructions.
Acceptance of the Terms and Conditions
As for the trained models, if the dataset provider has specified Terms and Conditions, accepting these is a pre-requisite for being allowed to order the dataset. In such a case, a check‑box and a link are displayed next to the Order Dataset button. The link allows opening the T&C text in a new page and the checkbox allows accepting the conditions.
Accept the T&C (if present) and click on the “Order Dataset” button to get a copy of the data in your workspace datastore. When the copy is complete, the data becomes accessible from the personal IDE of the workspace users. All the users in the workspace may thus use the data to train new models.
If a dataset has already been ordered by the user, this is stated in the details panel.
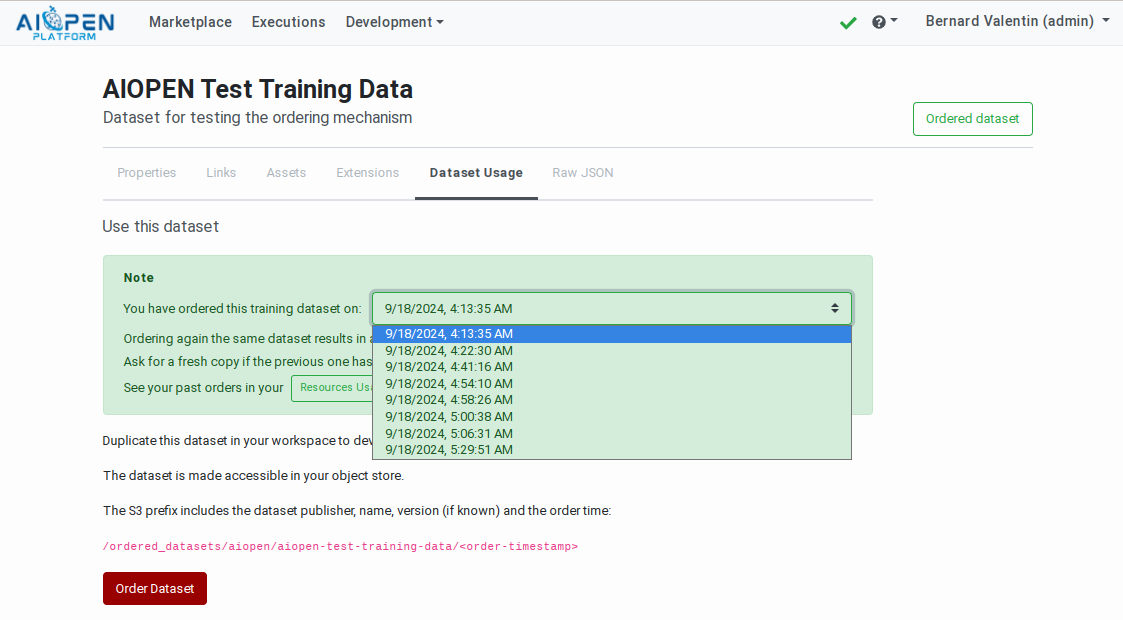
Dataset ordering panel in the Training Data details page#
A history of previously ordered datasets can be found in the Resources Usage Tracking page.
The accepted T&Cs may be inspected and revoked individually in the User Profiles page. See: Terms and Conditions Management.
Using Ordered Datasets#
The ordered datasets are made available in the Developer workspace bucket named {workspace}-data. The files are thus automatically accessible from within the Developer IDE where the workspace buckets are mounted and may be used to train new models (see AI Models Development and Training).
The path to the ordered datasets has the form: ordered/{ownder}/{dataset-id}/{timestamp}/{files}.
For example:
ordered/aiopen/aiopen-test-training-data/2024-09-19_00_36_08/srr-tests/2018_01.tif
Because the ordered datasets are located in the workspace bucket, the files may be altered (overwritten, deleted). For this reason it is possible to order the same data multiple times. Each time the new copy will be available in a new path.
For the same reason, the ordered data may be accessed remotely using an S3 compatible client (see Training Data Management).
Terms and Conditions Management#
The User Profile page, accessible via the user personal menu located in the navigation bar, provides the list of accepted Terms and Conditions (T&C). Each T&C may be inspected again, using the provided external links, and revoked individually.
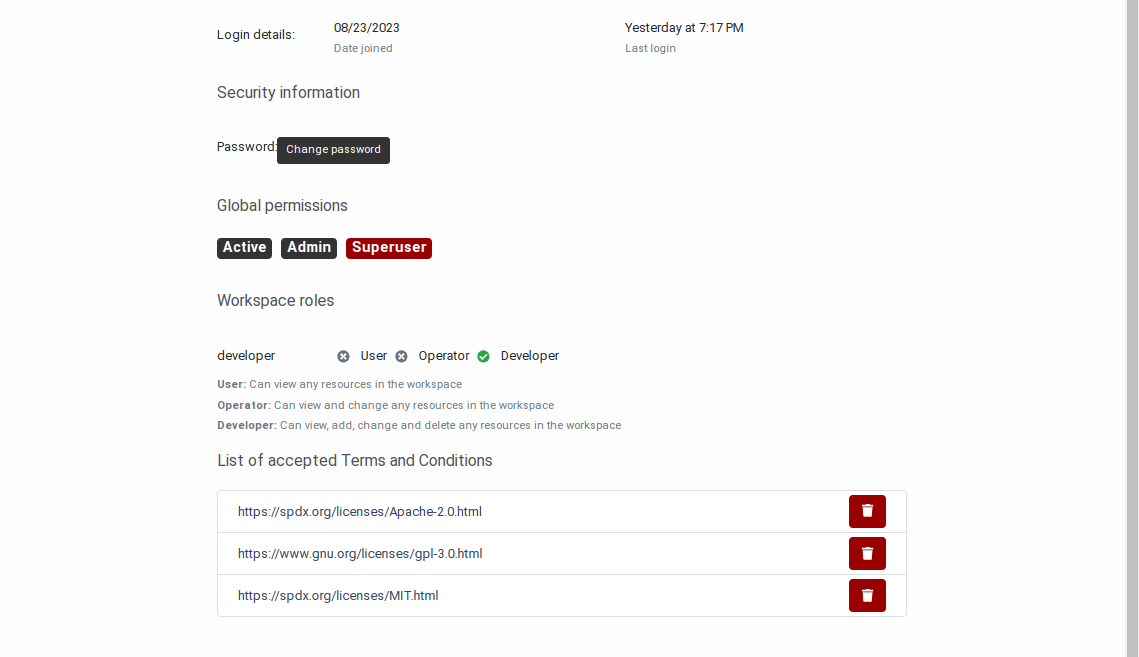
User Profile page with list of accepted Terms and Conditions#
The consents provided in model execution pages and in dataset ordering pages are recorded and applied to any resources associated to the same T&C.
Revoking a T&C automatically applies to all the resources associated to that T&C, meaning that the next time such a resource must be executed or ordered, it will again be necessary to accept the T&C.
Resources Usage Tracking#
The Resources Usage page provides authenticated users with the history of the resources they have ordered or used. The page is accessible in the user personal menu located in the navigation bar.
The Resources Usage page contains tabbed panels with the following information:
The history of models executions requested via the Marketplace for obtaining predictions. This information is also available in the Executions page and the execution reports. However the history table contains resources consumption oriented information such as the start and end time and the duration of each execution.
Each table row also includes a button for navigating to the corresponding model details page.
The models deployed as services (MaaS) with their start and stop times and the duration. The actual service calls are not tracked as models deployed as services consume cloud resources as long as they are deployed.
Each table row also includes a button for navigating to the corresponding model details page.
The ordered training datasets with the ordering time.
Each table row also includes a button for navigating to the corresponding dataset details page.
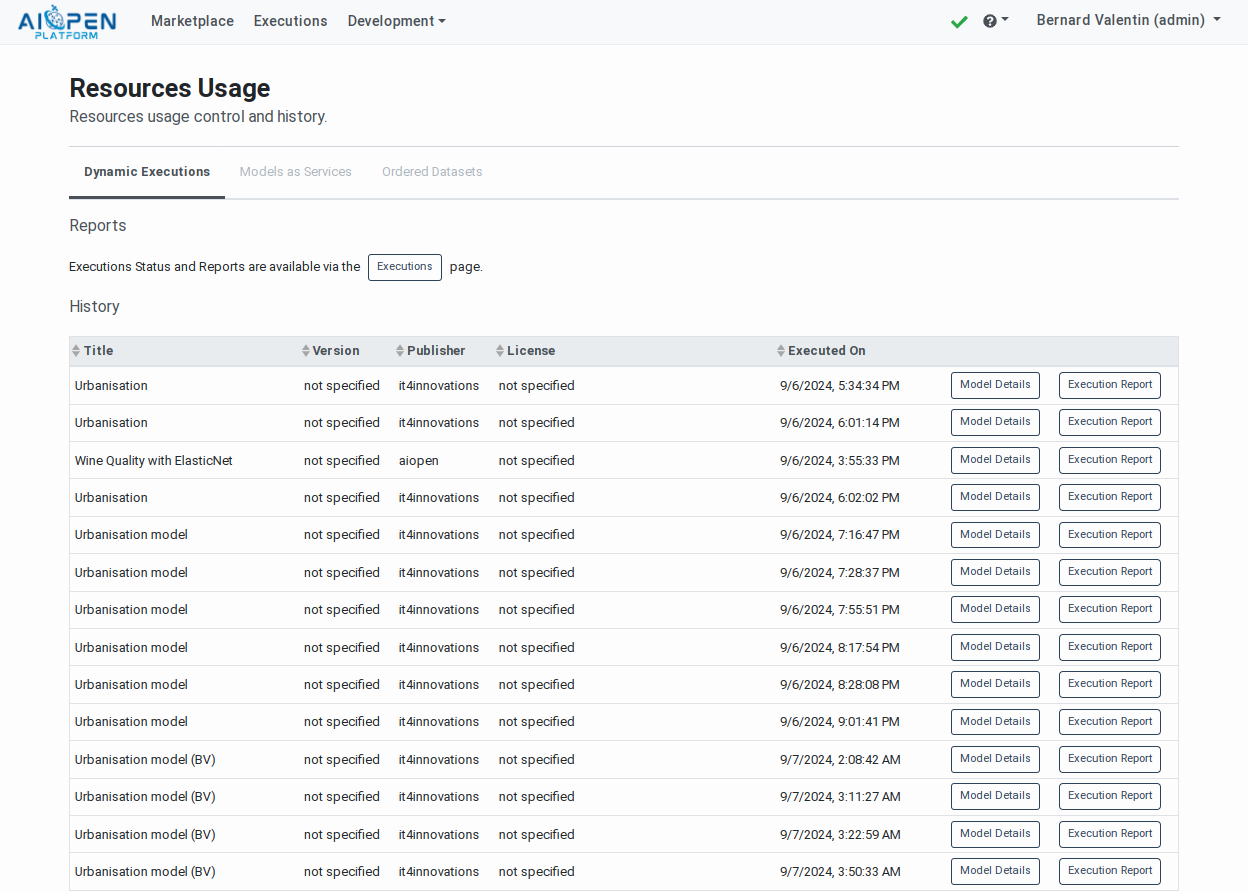
Model on-demand executions panel in the Resources Usage page#
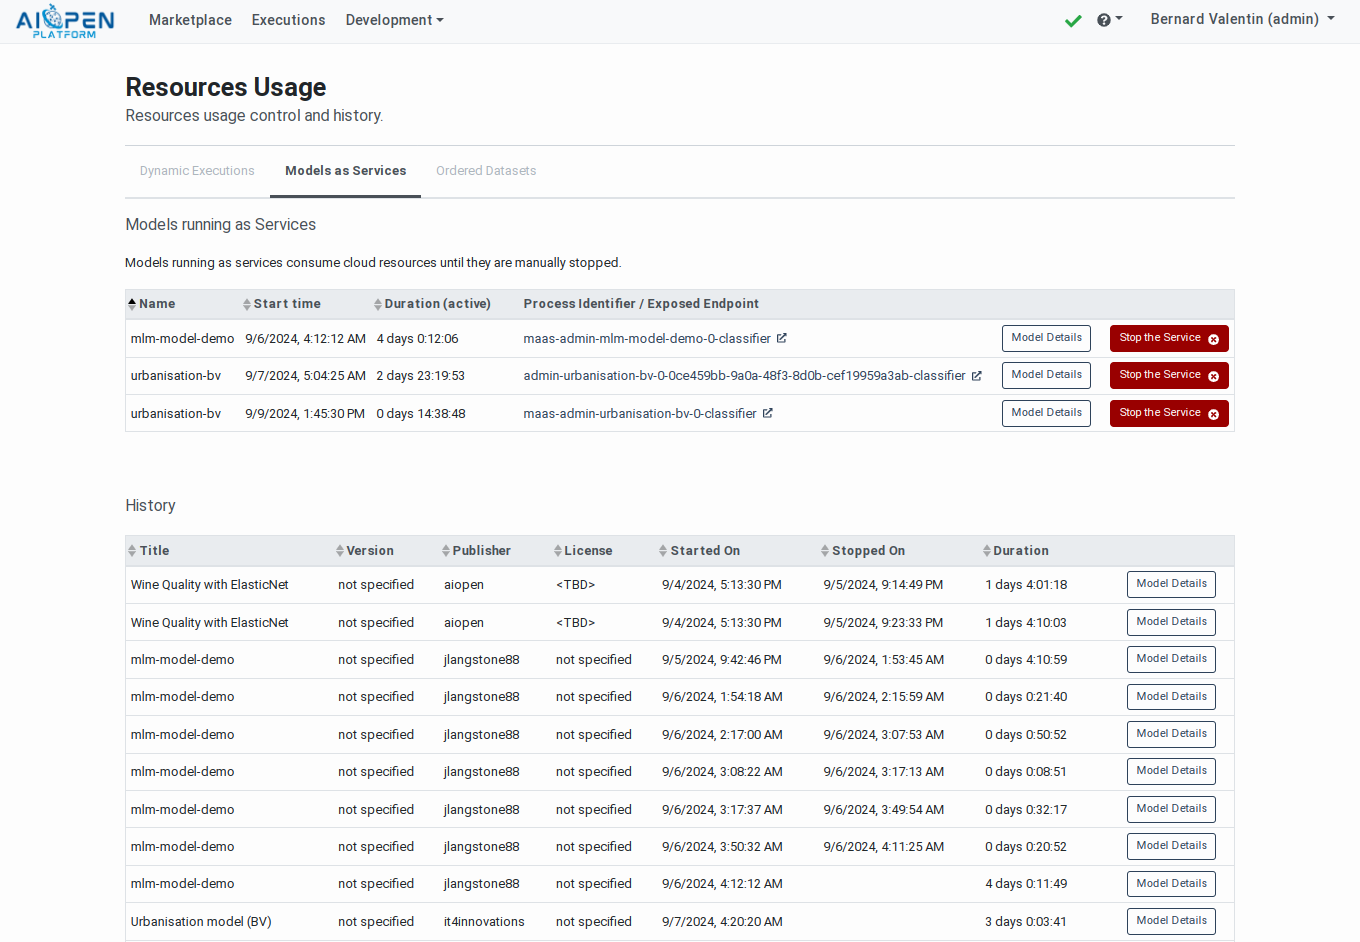
Models running as Services panel in the Resources Usage page#
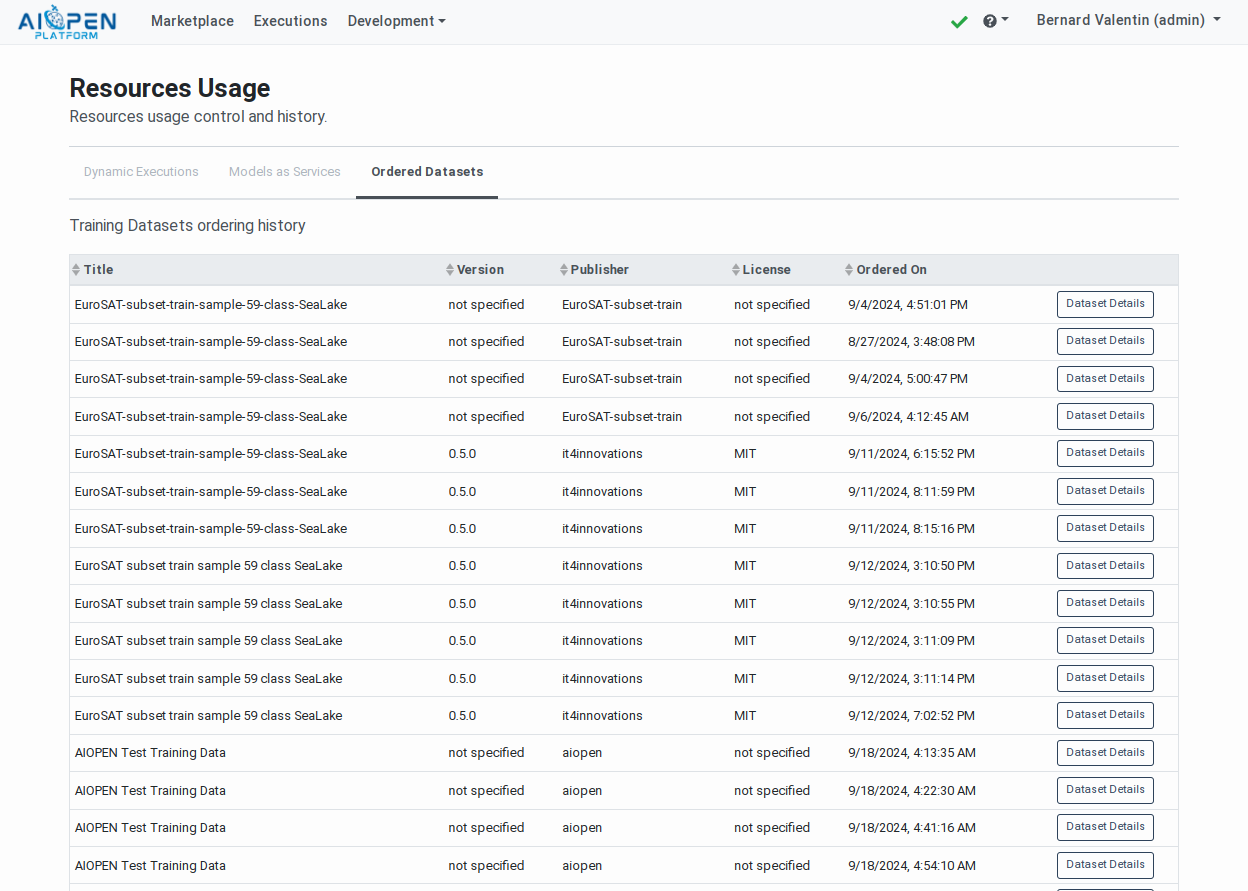
Ordered Datasets panel in the Resources Usage page#