Developer Manual#
On-Boarding#
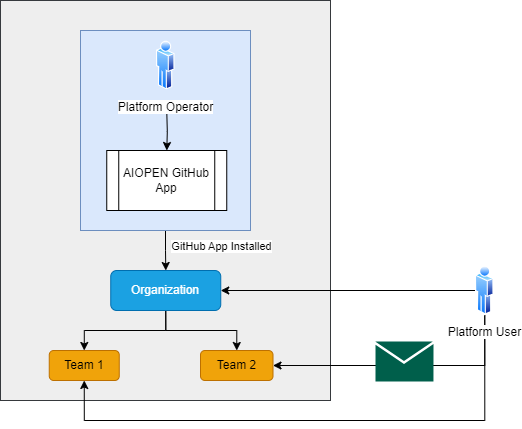
We utilize several key features from GitHub as a cornerstone of governance for AIOPEN developers. Two notable features are GitHub Organizations and GitHub Teams. An organization on GitHub is a shared account where businesses and open-source projects can collaborate across many projects at once. Members can then be organized into teams within the organization with different permissions across all repositories within the organization. To utilize the AIOPEN platform as a developer, you must have an active GitHub account and be a member of a GitHub organization. This organization will have been configured by the AIOPEN platform operator with a GitHub App, which is essentially a webhook to link the AIOPEN platform with the GitHub organization. This is a public App that is not on the marketplace but is provided via a public link. At this point, AIOPEN platform will be listening to the GitHub organization for any activity. The operator will then create a workspace custom resource within the cluster aligned with the organization/team for the developer/s to work in, alongside all the resources that come with being part of a workspace.
On-Boarding Process#
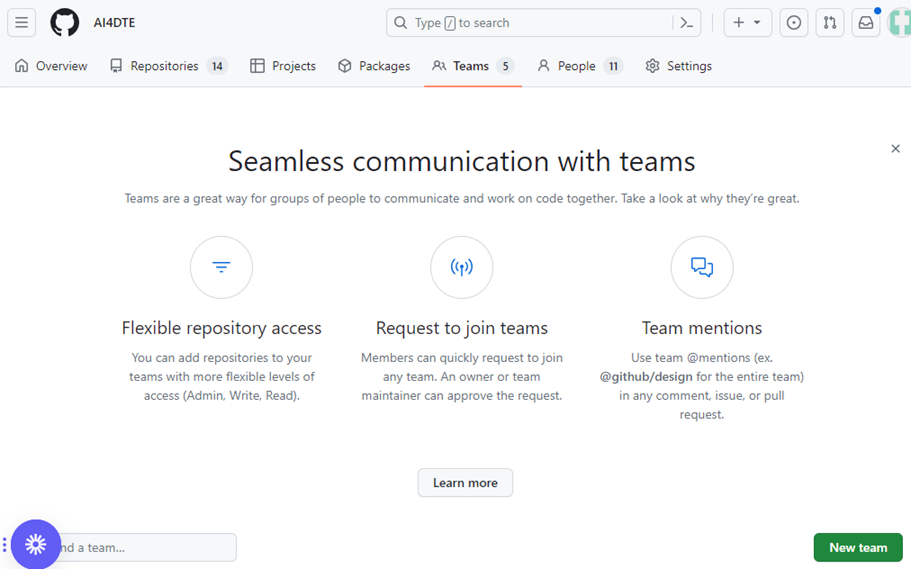
A user who wants to join a workspace must be invited to the organization and then be invited to a GitHub team. To create a team as an admin of the organization, go to the GitHub organization page, selection Teams → New team. Then fill out the form with a suitable name.
Create a GitHub Team#
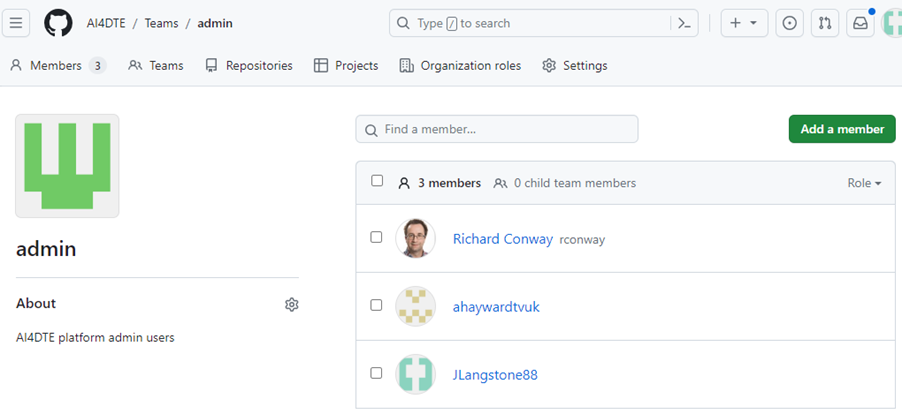
To invite members to an existing team, click on a Team in the table then click on Add a member.
Add Member to GitHub Team#
Authentication#
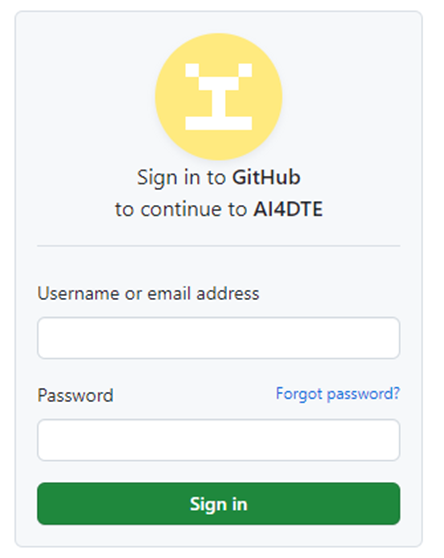
We use GitHub not only as the host point of structural governance for developers but also as an identity provider to other services within the AIOPEN developer platform. When you try to access the Model Registry, IDE, Catalogs or Development Environment UI, you will be prompted to provide your GitHub credentials.
GitHub Login Form#
Repository Management#
Warning
Repository names MUST be lowercase!
The AIOPEN developer platform repository management is critical for maintaining a streamlined and collaborative development environment. This involves organizing and controlling access to repositories with the GitHub organization, ensuring efficient version control, and integrating with your development tools.
To ensure your repository is accessible within your AIOPEN workspace, make sure your repository adheres to the naming convention of using lowercase letters. Then go to the repositories main page on GitHub and click on the Settings tab. In this, select Collaborators and teams, to open the access management page. Then click Add teams and select the team that you want.
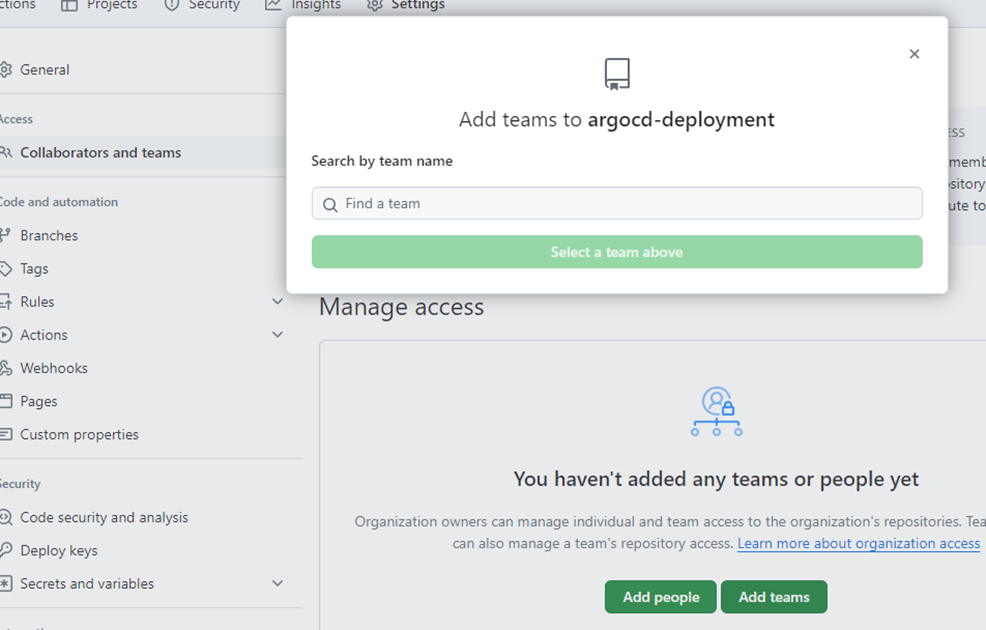
Add Repository to GitHub Team#
Workspace#
A workspace is a collection of resources shared by a team of model and/or application developers. The workspace provides a copy of MLflow for experiment tracking (Model Registry), a model repository (object store) into which MLflow will save models and from which they can be read later, an object store for use as DVC remote storage and an additional miscellaneous bucket. More object store buckets can be added to a workspace on request. The workspace also provides an interface to create user specific API keys to access MLflow externally and calibrated IDEs to access via JupyterLab or SSH to develop their models. A dedicated catalog is also available to users that are members of that workspace.
Creating a workspace is not handled at the user level. This is dealt with by the AIOPEN platform operator. You would inform the operator that you would like to create a workspace and they would make a git commit to the platform, triggering the workspace controller to create the resources.
The file committed to GitHub for the workspace creation requires a name of the workspace, names of the S3 storage buckets and the GitHub organization/team pairing it belongs to. By default, a workspace creates three S3 buckets:
{workspace}-modelrepo: This is where artifacts saved to MLflow are stored. They are later used as an instruction set to deploy the models.{workspace}-dvc: Versioned training data from using the dvc (Data Version Control) utility are used.{workspace}-data: Unversioned/Miscellaneous data is to be stored here.
The intended designation of usage of the buckets is a guideline only. The user can choose which buckets they want to put objects into at their discretion, apart from the {workspace}-modelrepo bucket that is defaulted to always be used to save model registry artifact data from MLflow.
To join a workspace, you must be invited to a GitHub team in the GitHub organization that you are part of. Once admitted, you will then be able to access the Development Services UI at https://onda-dev.ai-pipeline.org . You must provide your GitHub credentials to access this page.
Development Services Landing Page#
The Development Services UI is a protected Web page that allows developers manage access their workspace environments.
It is accessible at: https://onda-dev.ai-pipeline.org . It contains the following sections:
A tool for generating MLflow access keys. With such a key, a developer may train a model on his/her local system and have the session information (parameters, attributes, metrics, etc.) collected in the MLflow instance running in the AIOPEN user workspace.
A tool for generating key pairs for accessing the Personal IDEs using ssh.
Controls for starting and stopping Personal IDEs.
A tool for generating STAC Items describing resources such as training data and trained models. Such descriptors allow sharing and publishing resources on the Marketplace.
Development Services UI Landing Page#
Each of the sections is further detailed below.
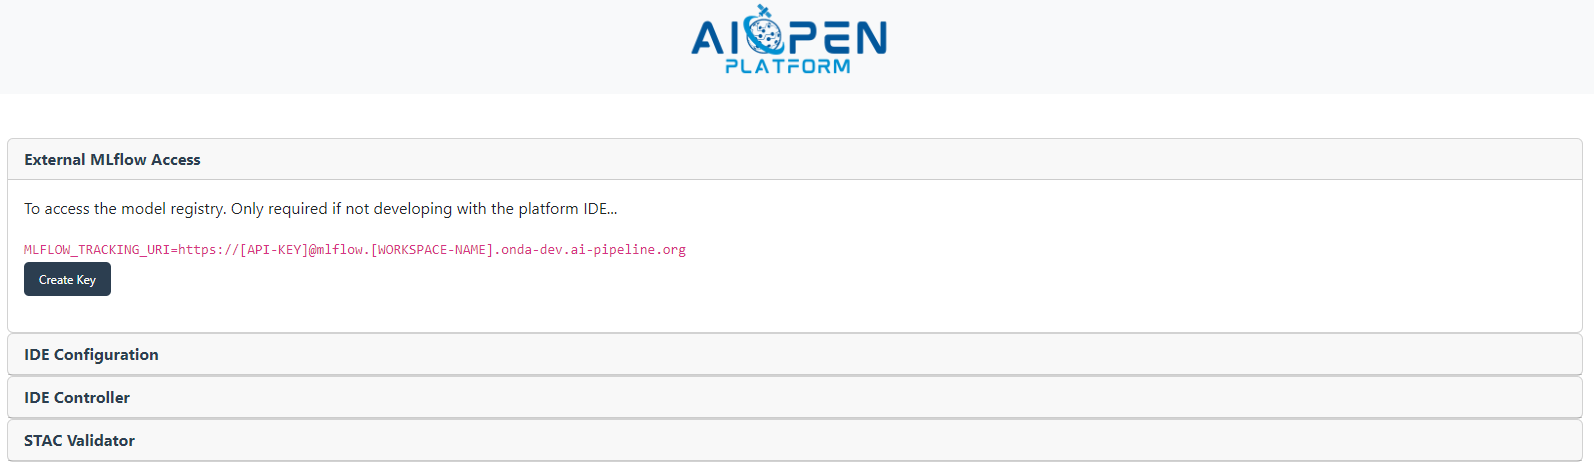
Configuring remote access to MLflow#
When using MLflow for tracking machine learning experiments, the setup process varies depending on whether you are running experiments from the AIOPEN platform (your IDE) or from your own environment (e.g. local VSCode).
If you are running experiments from your own environment, you need to go to the Development Services UI and generate an API key for authenticating with the workspace instance of MLflow you are associated with. You then use this as the value of MLFLOW_TRACKING_URI, pointing to the MLflow tracking server.
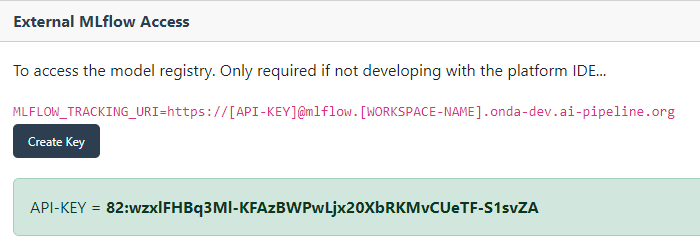
Generated API Key for External MLFlow Access#
Configuring GitHub Access to IDEs#
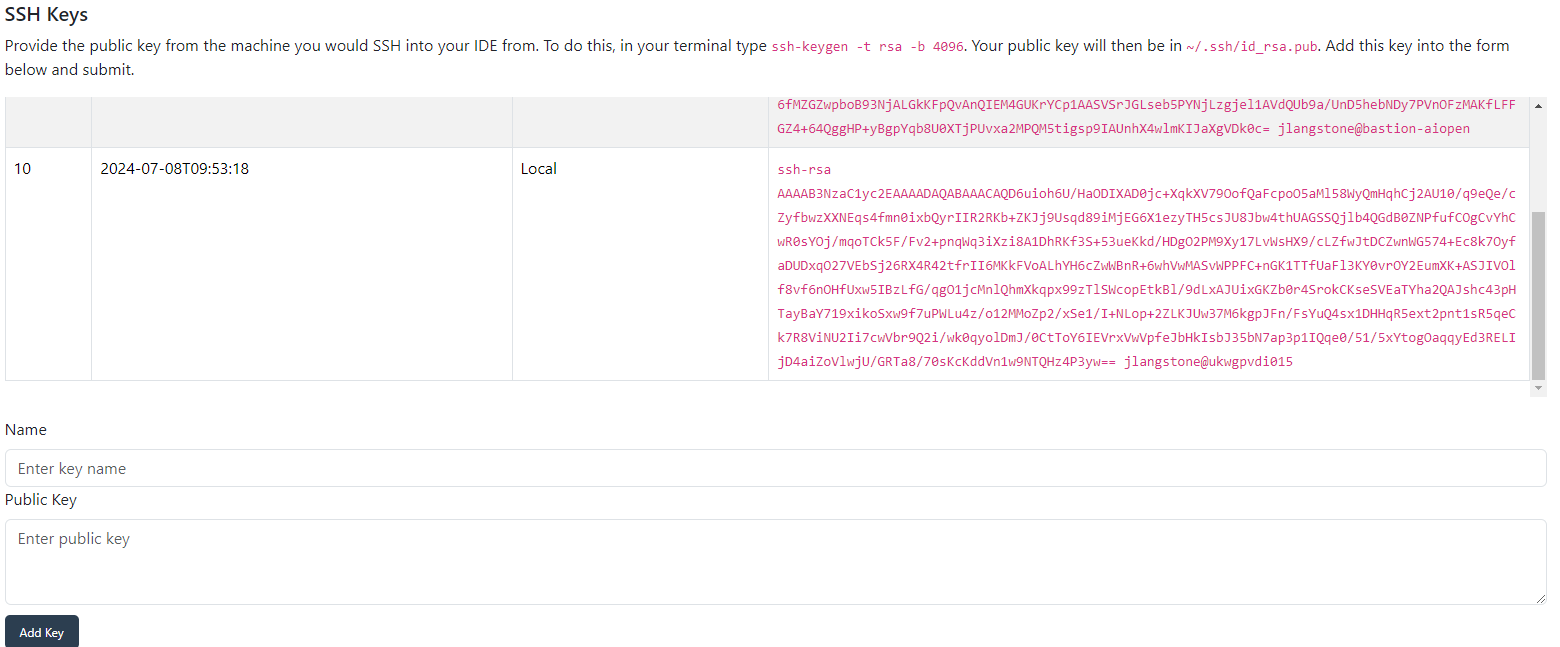
A critical feature of our platform is its ability to automatically clone your GitHub repositories into the IDE. To facilitate this, you need to paste a pre-generated public key provided by our platform UI into your GitHub account. This step is necessary to grant seamless integration between GitHub and your IDE, ensuring that your repositories are readily available for development as soon as the IDE is up and running. Note that the repositories that are cloned will be ones that are members of the same GitHub team as you are. You must paste this in Settings → SSH and GPG Keys → New SSH Key from the GitHub navigation menu.
Configuring SSH Access to IDE#
Controlling Personal IDE#
Warning
You must configure all the sub-sections above before starting the IDE.
The development services UI includes an IDE controller, allowing you to manage your IDE instances. Through the IDE controller, you can start and stop your IDE and monitor it’s status in real time. It also displays essential information such as the SSH address and JupyterLab URL, giving you all the details you need to access and manage your development environment.
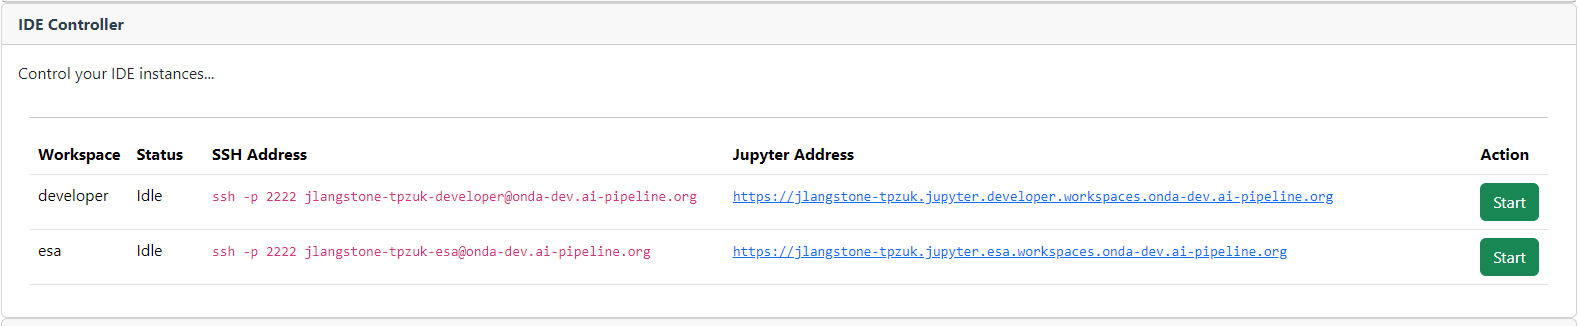
IDE Controller#
The first time you create an IDE, it takes approximately five minutes for JupyterLab to be fully available. This initial delay is primary due to DNS configuration and other backend processes. Once the setup is complete, subsequent restarts of the IDE are significantly faster. The IDE Controller section tells you the SSH address that you will use to connect to the IDE. To do this, open the terminal and enter the address.
To connect via the JupyterLab, paste the JupyterLab URL in the web browser. You should see on the left the repositories from your workspace that have been cloned into the IDE.
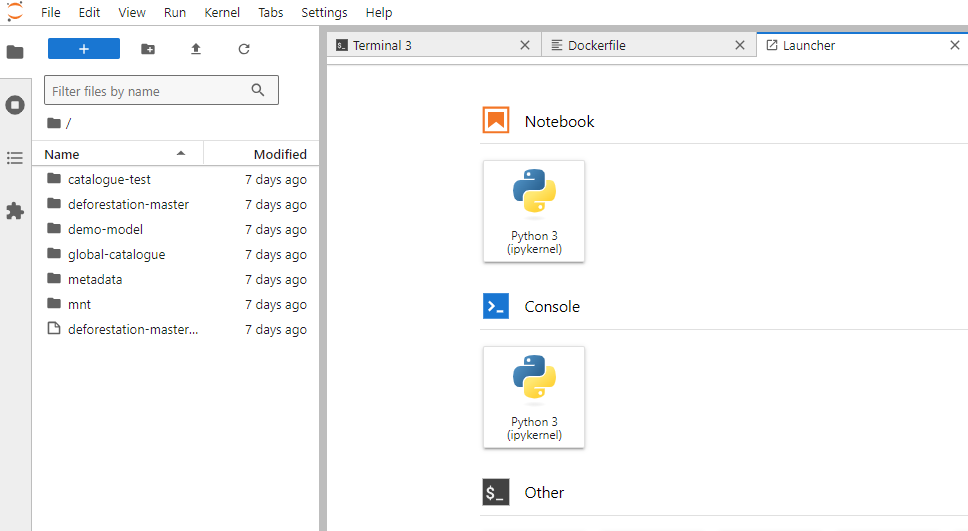
JupyterLab Launcher#
The IDE provides a suite of tools designed to streamline your development workflow. Git integration allows you to manage your source code effectively, track changes, and collaborate with other members of your workspace team. Ploomber CLI is available to create workflows, DVC (Data Version Control) is auto installed, which enhances your ability to manage large datasets and ML models. We also have AWS CLI and its associated credentials preconfigured, enabling you to manage data to and from the S3 buckets. This means you are automatically authenticated to the object store.
Using the STAC Validator#
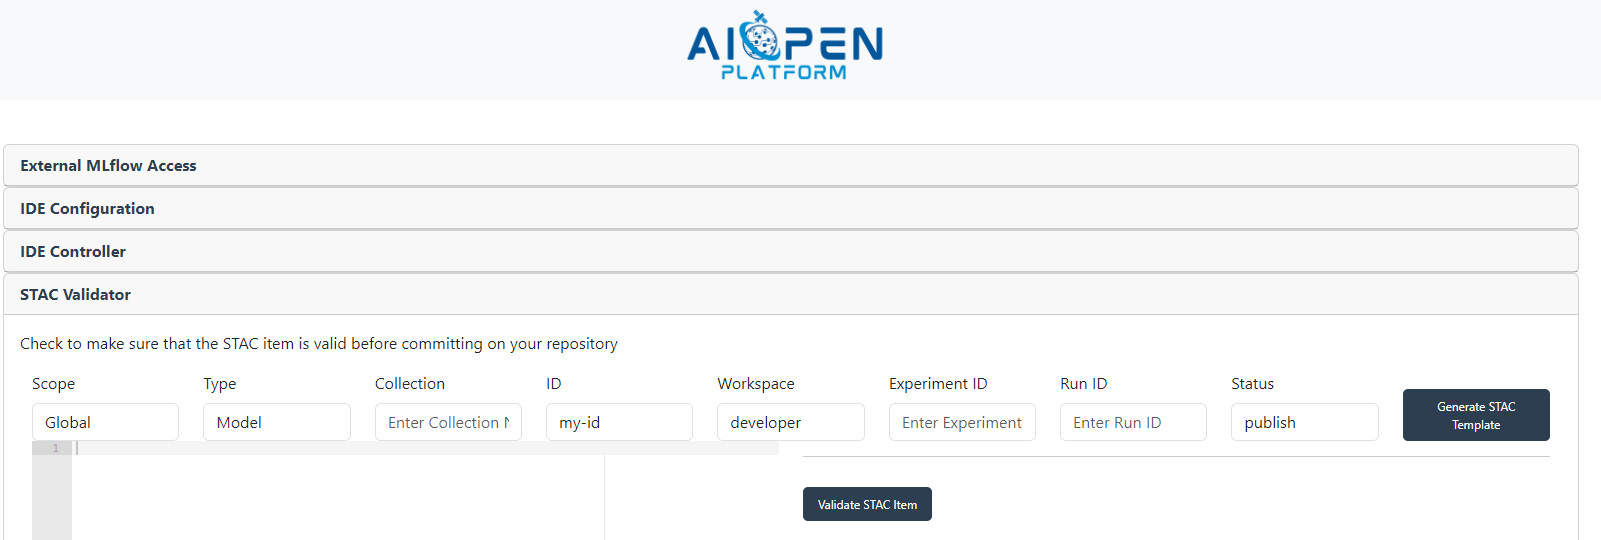
The STAC Validator section allows the users to generate and validate STAC Items they wish to publish and make sure they are ‘linted’ and formatted correctly before committing on GitHub to the local / global catalogues. There are 2 buttons. One is to generate a generic boilerplate template, which the user would then fill out and expand upon with relevant STAC extensions and the other button is to check that it fulfils the schema set out.
To create a STAC Item that represents a trained model, the form must be filled-in with the user workspace name, the experiment identifier and the run identifier (as found in the MLflow user interface - see Inspecting the training sessions in MLflow).
STAC Validator input form#
E.g. If you have a STAC extension and you have not added a REQUIRED property, then the web interface will tell you to correct it. Refer to the Sharing and Publishing section for more information on the composition of the STAC items.
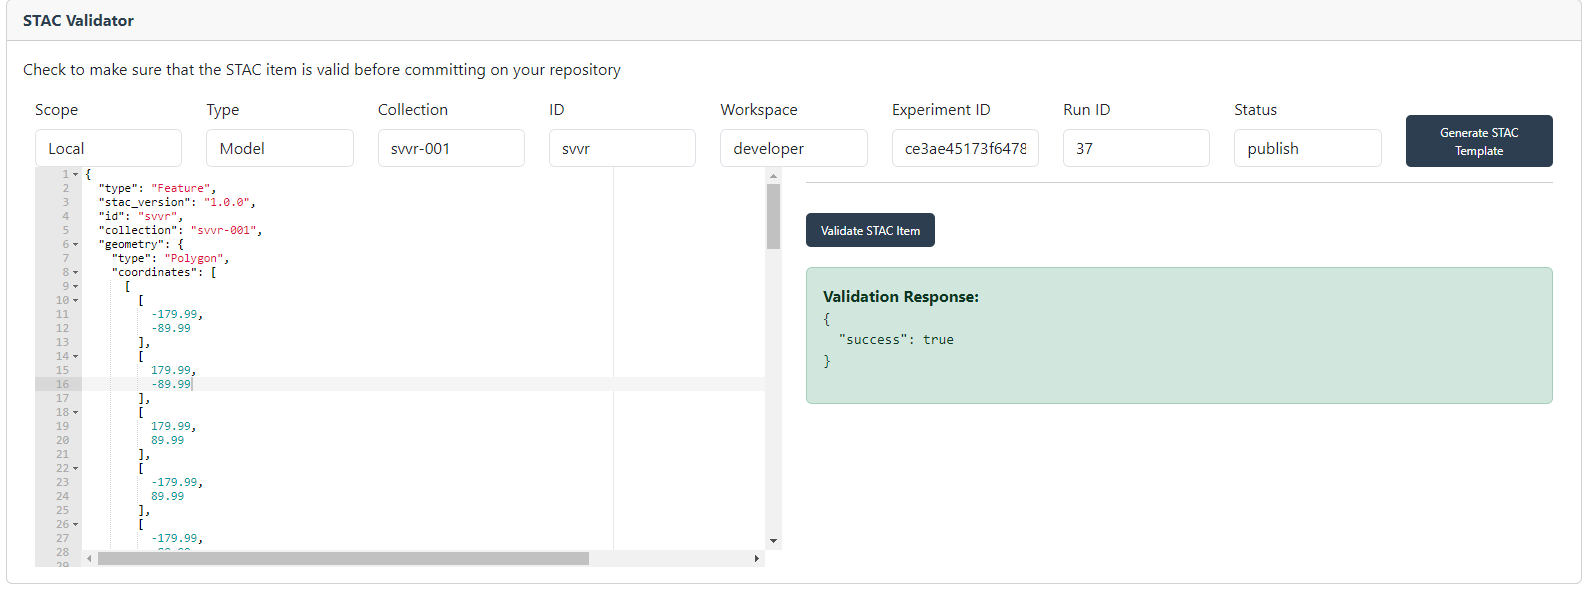
If the STAC Item is valid, a green box is displayed informing about the successful validation.
STAC Validator with valid STAC Item#
See the Using the STAC Specification chapter to learn how specific information must be included in the STAC Items.
Training Data Management#
Import Files#
By default, the AWS CLI and rclone are installed on the IDE and the S3 credentials are stored as environment variables. These are command line tools that are preconfigured to interact with the S3 cloud storage. To import datasets from outside the platform into S3, there are many ways to go about this. One is to install AWS CLI on your machine and followng the instruction setup depending on your OS. You would then need to
configure your AWS CLI to point to the object store for your workspace buckets. The AIOPEN platform operator will provide you with:
AWS_DEFAULT_REGION(default:gra)AWS_ENDPOINT(default:https://s3.gra.io.cloud.ovh.net)AWS_SECRET_ACCESS_KEYAWS_ACCESS_KEY_ID
To verify you can connect to the object store, the following command typed in a terminal must give you a list of buckets available to you:
aws s3 ls
To import data, simply type in the terminal:
aws s3 cp /path/to/your/file.txt s3://your-bucket-name/.
Delete Files#
To delete training data from s3, simply type in the terminal:
aws s3 rm /path/to/your/file.txt
AI Models Development and Training#
Warning
It is the developers responsibility to deal with merge conflicts etc. The IDE will do an initial clone of a repository but will not automatically git pull. It is the developers responsibility to use the latest iteration of the repository.
Accessing training data in the workspace datastore (mounted S3 bucket)#
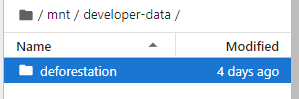
To access training data from the S3 bucket, the IDE is automatically synced to it. Every IDE has a /mnt folder and inside this is access to the contents of the training data. Simply replace the paths in your scripts to $HOME/mnt/path-to-bucket-data, e.g. $HOME/mnt/developer-data. In JupyterLab view you can easily see the S3 structure within each bucket, as seen below.
Synced S3 in IDE#
When a user imports new training data, it will automatically sync up in the IDE, allowing you to instantly access it. Conversely, you can add data to the S3 from the IDE itself by placing it inside the $HOME/mnt/{BUCKET-NAME} folder.
Training your Model - Simple cookbook#
Each IDE comes with Python 3.11.9. To train your model, you would invoke your code using nominal methods. To integrate with MLflow and log your training, you must learn how to use the MLflow python client (note: this library is auto installed on the IDE). For example, we have a simple Model using the Iris dataset and we train it. You can do this via SSH or with JupyterLab.
import mlflow
from mlflow.models import infer_signature

import pandas as pd
from sklearn import datasets
from sklearn.model_selection import train_test_split
from sklearn.linear_model import LogisticRegression
from sklearn.metrics import (
    accuracy_score,
    precision_score,
    recall_score,
    f1_score,
)

# Load the Iris dataset
X, y = datasets.load_iris(return_X_y=True)

# Split the data into training and test sets
X_train, X_test, y_train, y_test = train_test_split(
    X, y, test_size=0.2, random_state=42
)

# Define the model hyperparameters
params = {
    "solver": "lbfgs",
    "max_iter": 1000,
    "multi_class": "auto",
    "random_state": 8888,
}

# Train the model
lr = LogisticRegression(**params)
lr.fit(X_train, y_train)

# Predict on the test set
y_pred = lr.predict(X_test)

# Calculate metrics
accuracy = accuracy_score(y_test, y_pred)
In this next step, we’re going to use the model that we trained, the hyper parameters that we specified for the model’s fit, and the loss metrics that were calculated by evaluating the model’s performance on the test data to log to MLflow.
The steps that we will take are:
Initiate an MLflow run context to start a new run that we will log the model and metadata to.
Log model parameters and performance metrics.
Tag the run for easy retrieval.
Register the model in the MLflow Model Registry while logging (saving) the model.
# Set our tracking server uri for logging
mlflow.set_tracking_uri(uri="https://[API-KEY]@mlflow.[WORKSPACE-NAME].onda-dev.ai-pipeline.org")

# Create a new MLflow Experiment
mlflow.set_experiment("MLflow Quickstart")

# Start an MLflow run
with mlflow.start_run():
    # Log the hyperparameters
    mlflow.log_params(params)

    # Log the loss metric
    mlflow.log_metric("accuracy", accuracy)

    # Set a tag that we can use to remind ourselves what this run was for
    mlflow.set_tag("Training Info", "Basic LR model for iris data")

    # Infer the model signature
    signature = infer_signature(X_train, lr.predict(X_train))

    # Log the model
    model_info = mlflow.sklearn.log_model(
        sk_model=lr,
        artifact_path="iris_model",
        signature=signature,
        input_example=X_train,
        registered_model_name="tracking-quickstart",
    )
In the above code snippet, we did:
mlflow.set_tracking_uri(uri="https://[API-KEY]@mlflow.[WORKSPACE-NAME].onda-dev.ai-pipeline.org")
This is only necessary when training EXTERNALLY from the platform, where you would get the API token from the Development Environment UI in a previous section.
To run this INTERNALLY within the IDE, you can OMIT this line of code. The MLFlow client would instead read the MLFLOW_TRACKING_URI environment variable, which is preconfigured on IDE initialization to point to the MLFlow instance associated with the workspace IDE. All users that belong to the same workspace will SHARE this MLflow instance.
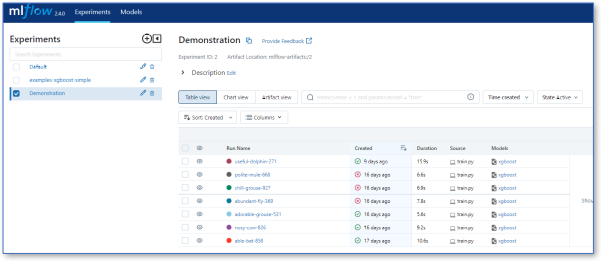
Inspecting the training sessions in MLflow#
To access your workspace MLFlow, go to https://{WORKSPACE-NAME}.workspaces.onda-dev.ai-pipeline.org. You will be required to provide your github credentials.
When you run the training code and access the browser, you should see a training run in the UI under the experiment name as set our in the code (mlflow.set_experiment_name()). Within each experiment you have a set of training runs.
MLflow user interface#
MLFlow has many features allowing you to optimize your training and compare with previous runs, as shown below.
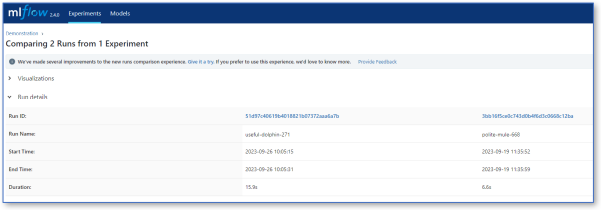
Comparison of training runs in MLflow#
If you click on a run, in the Artifacts section you will display a directory and list of files. These are automatically copied into s3://{workspace-name}-modelrepo.